Alright, it's official. I'm no longer posting here...
Because I'm starting to post on my new blog!
My first post went up there today. However, I'm waiting to throw a full-blown launch party until Monday next week so that I can work out all the kinks and problems. It still does have some little quirks, so please forgive me while I work those out.
Please, please follow me there! I'll be posting in Facebook and on Twitter as new posts go up, and once I get the RSS feed working and get links to other social media hubs up and running, you ought to be able to follow me as you please.
So go and see my latest post! There's a free printable template for some really cute Valentine candy boxes. I think you'll like them!

Wednesday, January 30, 2013
Monday, January 28, 2013
Owl Embroidered Cotton Blanket
A friend of mine is having a baby girl and her nursery colors are orange and grey. At her babyshower over the weekend, I knew a lot of people would be giving her flannel and fleece blankets, which are completely necessary and important. But when Graham was born, that's all I had blanket-wise. I learned that sometimes, you just need something lighter weight for hot days or to use as a cover up while breastfeeding so that your baby doesn't smother and sweat profusely underneath a fabric that doesn't breathe.
Keeping all of that in mind, I made a cotton gauze blanket and used the same DIY embroidering technique as I did on Graham's monogrammed blanket, except this time I made an owl instead of an initial. (I love cotton gauze because it's so lightweight. It was a life saver on hot days last summer with a newborn!)
I'm really pleased with how it turned out!


I love the soft, fringed edges.

I did have to be a little more careful in removing the paper so that I didn't rip any of the stitching out, since there was quite a bit more sewing on this than just a single letter.

I'm excited to make some more of these and put them up for sale in my Etsy shop. I've been wanting to do that for a while now. *sigh* I'll get around to it sooner or later.

Keeping all of that in mind, I made a cotton gauze blanket and used the same DIY embroidering technique as I did on Graham's monogrammed blanket, except this time I made an owl instead of an initial. (I love cotton gauze because it's so lightweight. It was a life saver on hot days last summer with a newborn!)
I'm really pleased with how it turned out!
I love the soft, fringed edges.
I did have to be a little more careful in removing the paper so that I didn't rip any of the stitching out, since there was quite a bit more sewing on this than just a single letter.
I'm excited to make some more of these and put them up for sale in my Etsy shop. I've been wanting to do that for a while now. *sigh* I'll get around to it sooner or later.
Monday, January 21, 2013
Pink Pettiskirt
I made a bright pink pettiskirt for my niece for Christmas. She's almost one and a half, and it turned out to be a little big on her. Plus, I was in a rush to make it and I may (or may not) have made a few mistakes along the way. But at least she can grow into it! And it'll fit her for a while because I made the waist adjustable with elastic and ribbon.

Here's an image I made of it dissected so that you can understand how it goes together and how to make your own. Also, try only making 2 chiffon tiers instead of three.

It takes a while to sew because it's so much fabric and you have to gather all of the fabric at some point. So give yourself plenty of time!
While I didn't get any pictures of her wearing it (or my other niece who is 2, who it actually fit), you can still see how fun it is.

Some tips:
This skirt is supposed to be 2 layers. So you essentially make the same skirt with all this fabric twice, then sew them both to the satin at the top. I only made one layer (because of time constraints) but I really wish I'd been able to do two! It's still super cute as it is, but twice the ruffles would have made it a little fuller.
If you can find it in 4-inch or 5-inch wide spools of non-fray chiffon, get it. It's easier than cutting all of it. If you can't find it that way, I figured out a pretty good way to cut it. Carefully accordion fold and pin the selvage edges together, so that your folds are only about 2 feet wide. Lay the fabric on your cutting mat, and straighten it out so that it's as square and neat as you can get it. Starting from the bottom (where the pins aren't) place a yardstick across the fabric at the width it needs to be cut, and while you firmly press the yardstick down to hold the fabric in place, use a rotary cutter to slice through all the layers, making all the strips of fabric you need. It can be a little tricky, but it saves a lot of time.
A serger works way better than a zig-zag or other finishing stitch the average sewing machine makes. Finish all the edges before you start gathering and stitching tiers together. Otherwise you'll have a mess of frayed edges and you can lose some of your fabric width because of it.

Mark the halfway and quarter points of each tier so that you can match it up to the next tier's half and quarter points, keeping your gathers relatively even.

For additional tips and a tutorial, check out this one. I based mine off of it. It's pretty well done and quite thorough!
Here's an image I made of it dissected so that you can understand how it goes together and how to make your own. Also, try only making 2 chiffon tiers instead of three.
It takes a while to sew because it's so much fabric and you have to gather all of the fabric at some point. So give yourself plenty of time!
While I didn't get any pictures of her wearing it (or my other niece who is 2, who it actually fit), you can still see how fun it is.
Some tips:
This skirt is supposed to be 2 layers. So you essentially make the same skirt with all this fabric twice, then sew them both to the satin at the top. I only made one layer (because of time constraints) but I really wish I'd been able to do two! It's still super cute as it is, but twice the ruffles would have made it a little fuller.
If you can find it in 4-inch or 5-inch wide spools of non-fray chiffon, get it. It's easier than cutting all of it. If you can't find it that way, I figured out a pretty good way to cut it. Carefully accordion fold and pin the selvage edges together, so that your folds are only about 2 feet wide. Lay the fabric on your cutting mat, and straighten it out so that it's as square and neat as you can get it. Starting from the bottom (where the pins aren't) place a yardstick across the fabric at the width it needs to be cut, and while you firmly press the yardstick down to hold the fabric in place, use a rotary cutter to slice through all the layers, making all the strips of fabric you need. It can be a little tricky, but it saves a lot of time.
A serger works way better than a zig-zag or other finishing stitch the average sewing machine makes. Finish all the edges before you start gathering and stitching tiers together. Otherwise you'll have a mess of frayed edges and you can lose some of your fabric width because of it.
Mark the halfway and quarter points of each tier so that you can match it up to the next tier's half and quarter points, keeping your gathers relatively even.
For additional tips and a tutorial, check out this one. I based mine off of it. It's pretty well done and quite thorough!
Monday, January 14, 2013
Chalkboard Frame Disaster and Solution
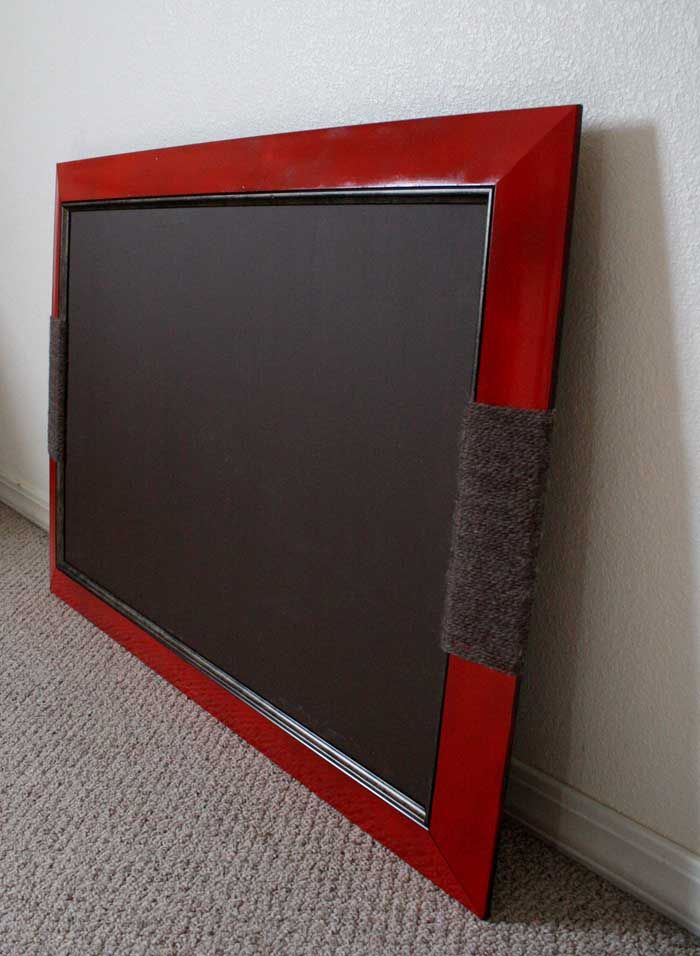
My sister-in-law is tough to gift shop for. It's not that she's picky or has expensive taste or anything like that. She's really fun and easy-going. But since I was making most of my gifts, that's where the biggest challenge was for me. She's really crafty too. Anything that I could think to make for her, she could probably make for herself and do a better job of it. I went through several ideas before finding a really big frame at a thrift store (about 2.5 feet by 3.5 feet) and deciding to make her a chalkboard.
I left my husband in charge of getting it done. We bought the supplies we needed, I found my pint of brown chalkboard paint leftover from making my own chalkboard and bulletin board set, and I explained my vision of it to Bob. He offered some ideas, and with our combined thoughts, he got to work on it.
And then a setback happened, as they always do.
Bob spray painted the frame red, and while it was drying outside on a chilly evening, the wind blew it over and one side of it broke in half, jostling 3 of the corners loose.
A couple of screws, a paint stir stick, two kinds of glue, and a staple gun later, it was back together.
But there was still the problem of the obvious big crack in one side of the frame. (I failed to take any pictures of that, sorry.) But I had a decent solution for it.
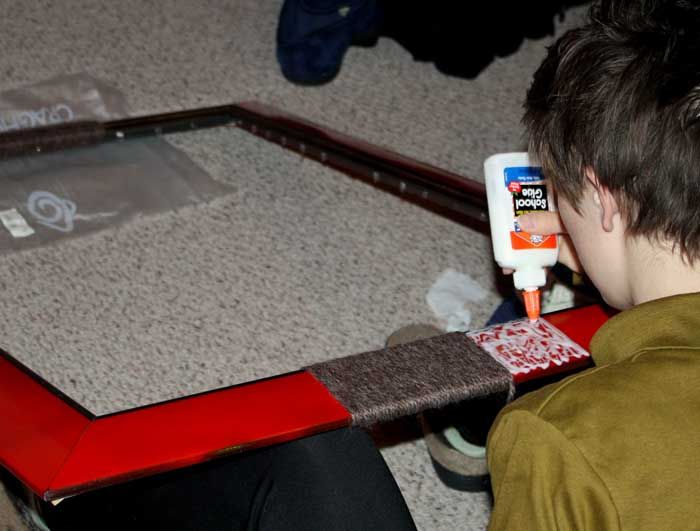
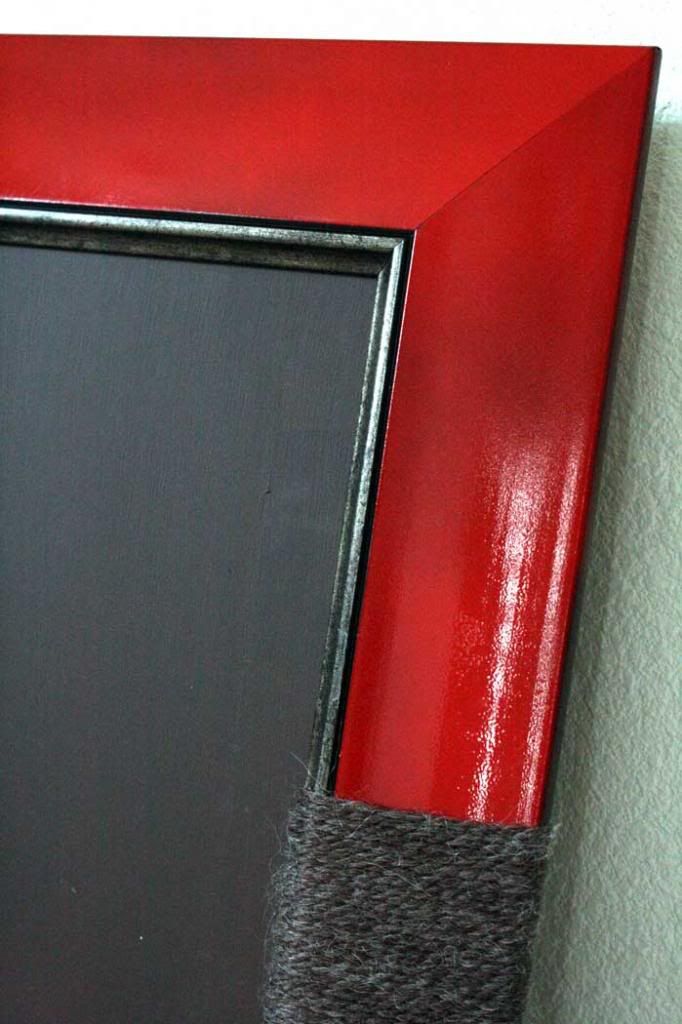
I used Elmer's glue and some alpaca yarn I had leftover from the Christmas ornaments that I made for a craft swap, and used it to wrapped the side that had the crack in it, along with the opposite side of the frame so that it would be symmetrical and match. I put glue directly on the front of the frame where the yarn would be covering it, as well as on the back to keep it in place.
I think I like it more with the yarn around it than without it. And the cool thing about yarn is that it stretches a little bit, so as I wrapped it I tried to keep it sort of loose. That way when we put the chalkboard into the frame the yarn stretched enough to let it sit nice and flat inside of it.
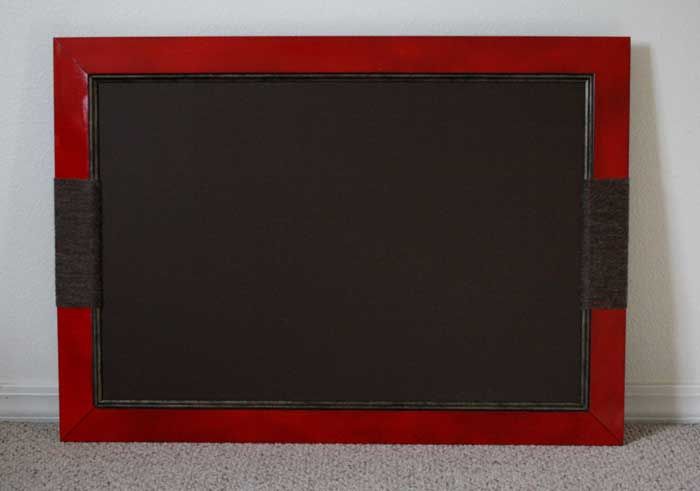
A tip: If you're making your own, or if you end up with one, I recommend that before using it for the first time take a piece of chalk and color in most of the chalkboard, then go back and erase it. That initial coat of chalk will make it erase better and more cleanly.
Ashley, I have no idea where you're going to put this (and if it stays in your closet for a while, that's fine too). But I hope it comes in handy at some point!
I left my husband in charge of getting it done. We bought the supplies we needed, I found my pint of brown chalkboard paint leftover from making my own chalkboard and bulletin board set, and I explained my vision of it to Bob. He offered some ideas, and with our combined thoughts, he got to work on it.
And then a setback happened, as they always do.
Bob spray painted the frame red, and while it was drying outside on a chilly evening, the wind blew it over and one side of it broke in half, jostling 3 of the corners loose.
A couple of screws, a paint stir stick, two kinds of glue, and a staple gun later, it was back together.
But there was still the problem of the obvious big crack in one side of the frame. (I failed to take any pictures of that, sorry.) But I had a decent solution for it.
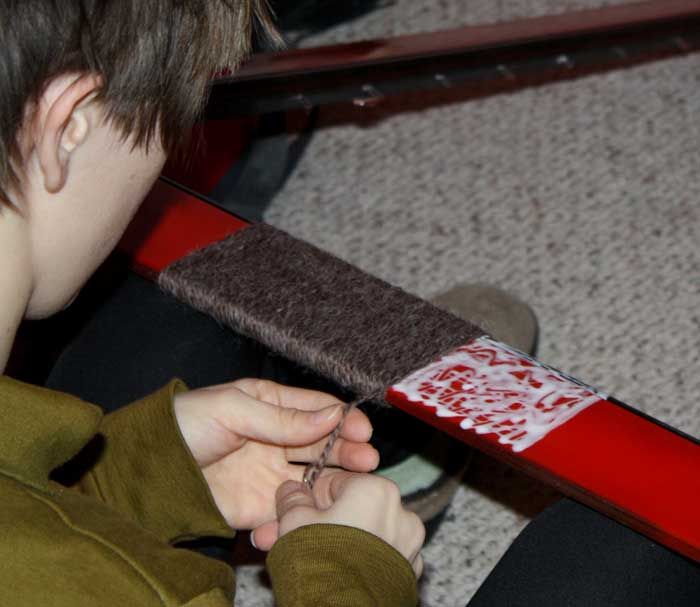
I used Elmer's glue and some alpaca yarn I had leftover from the Christmas ornaments that I made for a craft swap, and used it to wrapped the side that had the crack in it, along with the opposite side of the frame so that it would be symmetrical and match. I put glue directly on the front of the frame where the yarn would be covering it, as well as on the back to keep it in place.
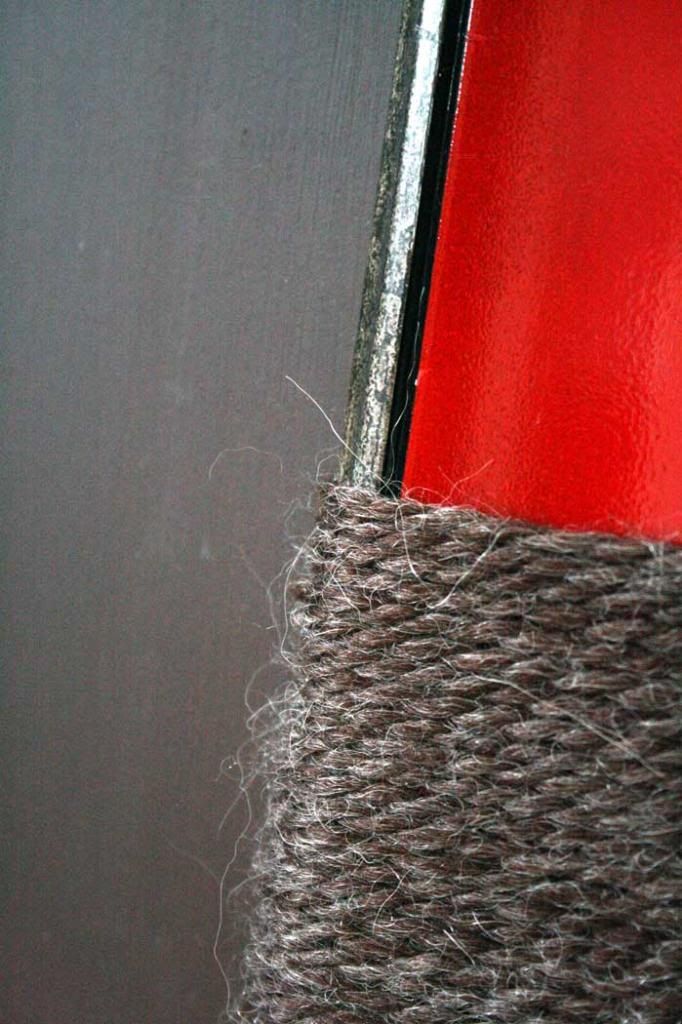
(I love that this alpaca yarn looks like a course string but is really soft to the touch.)
I think I like it more with the yarn around it than without it. And the cool thing about yarn is that it stretches a little bit, so as I wrapped it I tried to keep it sort of loose. That way when we put the chalkboard into the frame the yarn stretched enough to let it sit nice and flat inside of it.
A tip: If you're making your own, or if you end up with one, I recommend that before using it for the first time take a piece of chalk and color in most of the chalkboard, then go back and erase it. That initial coat of chalk will make it erase better and more cleanly.
Ashley, I have no idea where you're going to put this (and if it stays in your closet for a while, that's fine too). But I hope it comes in handy at some point!
Monday, January 7, 2013
Custom Monogrammed Mugs
It's tough to gift shop for my parents. They already have everything they need and anything else they might want is out of my price range. Last year I out-did myself and made a really unique wire wrapped tree for them.
This year I didn't know what to do. But there is this really good chocolate shop we love down here in San Diego, so we got my parents some really good drinking chocolate (Chili Burnt Caramel flavor) and some other chocolate too, so I made them some customized monogrammed mugs.
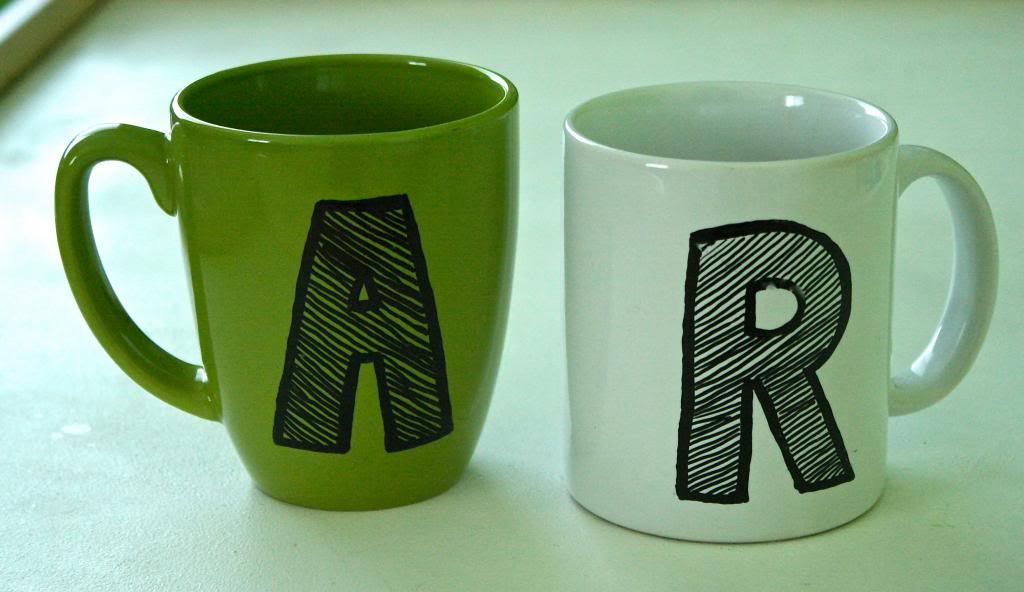
My dad is left-handed, so his letter is on the opposite side of his mug compared to my mom's, who is right-handed.

These are super easy to make. All you need is one or more clean porcelain mugs, an oil based Sharpie, an oven preheated to 300 degrees F, and 24 hours in advance of when you need them.
Draw whatever design you want on your mugs with the oil based Sharpie. Try using carbon transfer paper to trace your design on and then go over it with the ink.
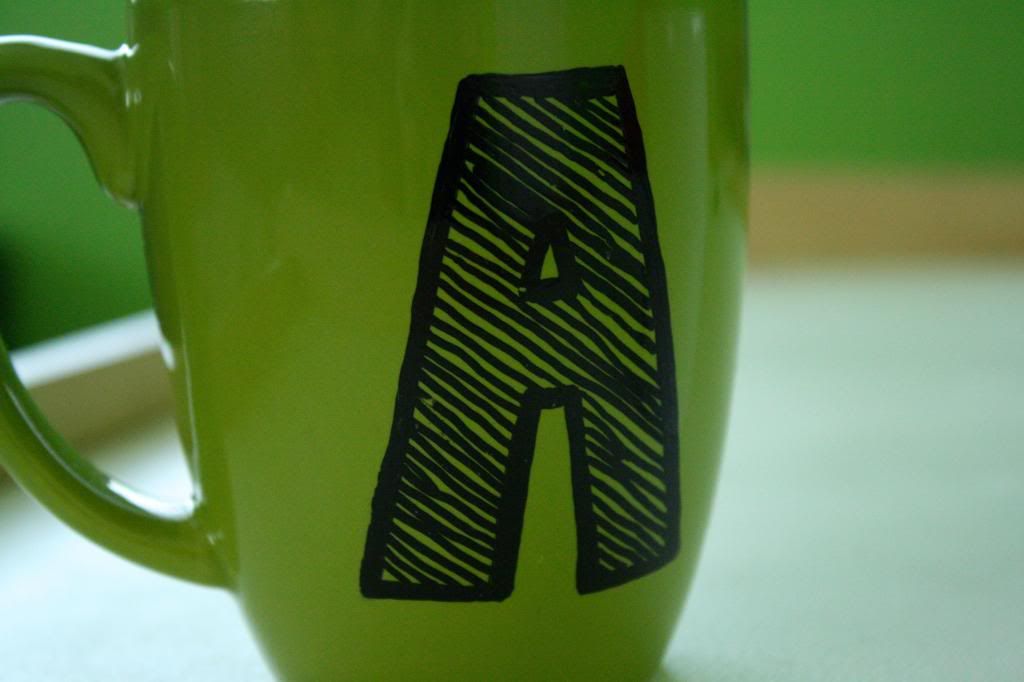
Be careful drawing on the mugs, because the ink runs really easily if you depress the tip too much... or at all sometimes. If it does run, Q-tips and paint thinner clean it up easily.
Once you're done with whatever design you want on your mugs, let them sit 24 hours so that the ink sets up well. Then bake at 300 degrees for 35-40 minutes. Try putting them on a cookie sheet so that they're easy to remove.
After they're baked, let them cool naturally at room temperature.
Care instructions: Hand wash as needed.
That's all there is to it. It's several little steps, but it's really simple and doesn't take very long (aside from the 24 hour wait).
I want to try this technique on plates and platters using other Sharpie colors. My imagination goes wild just thinking about the possibilities!
This year I didn't know what to do. But there is this really good chocolate shop we love down here in San Diego, so we got my parents some really good drinking chocolate (Chili Burnt Caramel flavor) and some other chocolate too, so I made them some customized monogrammed mugs.
My dad is left-handed, so his letter is on the opposite side of his mug compared to my mom's, who is right-handed.
These are super easy to make. All you need is one or more clean porcelain mugs, an oil based Sharpie, an oven preheated to 300 degrees F, and 24 hours in advance of when you need them.
Draw whatever design you want on your mugs with the oil based Sharpie. Try using carbon transfer paper to trace your design on and then go over it with the ink.
Be careful drawing on the mugs, because the ink runs really easily if you depress the tip too much... or at all sometimes. If it does run, Q-tips and paint thinner clean it up easily.
Once you're done with whatever design you want on your mugs, let them sit 24 hours so that the ink sets up well. Then bake at 300 degrees for 35-40 minutes. Try putting them on a cookie sheet so that they're easy to remove.
After they're baked, let them cool naturally at room temperature.
Care instructions: Hand wash as needed.
That's all there is to it. It's several little steps, but it's really simple and doesn't take very long (aside from the 24 hour wait).
I want to try this technique on plates and platters using other Sharpie colors. My imagination goes wild just thinking about the possibilities!
Thursday, January 3, 2013
Goals, Plans, and a New Year
I'm so excited for this new year. I have so many things going on in my life right now, and I'm thrilled to see how everything pans out.
I've set some goals for myself, my family, my blog, and my Etsy shop. I'm hoping to establish a regular exercise routine, get into our own apartment by summer, make myself a daily/weekly schedule to be a more effective blogger and self-employed mom, and make and sell items on Etsy on a more regular basis. Those seem kind of vague right now, but my husband and I are writing down our thoughts and ideas for how we want to reach our goals, and we're going to work together to help one another succeed at each of them. I'm giving myself this month to get those goals and plans organized. So come February 1st, I'm hoping everyday life will smooth out some and my posting will be a little more regular.
Another really exciting opportunity I've been given is to be a contributor for an inspirational blog. The blog founder/owner is a good friend of mine, and I'm so flattered that he thought to invite me to be one of the 10 bloggers for the site. I'll be posting there twice a month, every other Friday starting on January 11th. He shared with me some of his plans and goals for the blog, and I cannot wait to see where it goes!
 So what is that blog, you ask? It's called ForwardWalking.com.
The mission of it is to bring hope and inspiration to anyone going through difficult times, especially those struggling with low self esteem, addictions, deaths of loved ones, broken families, etc. I've read through several posts there already, and each one is so wonderful! At the end of every one I feel completely rejuvenated and ready to overcome my own challenges and trials. It's definitely inspiring, and a wonderful pick-me-up anytime you need it.
One of the main reasons I'm so glad to be a contributor there is to give myself and my hardships a purpose. I love to help others. If I can use my past trials to help someone currently going through something similar, I am more than happy to do so! I hate to see anyone struggling on their own when I could offer a helping hand. This is one way for me to do that.
Those are just a few of the exciting things happening for me as this new year begins.
What are your goals? What to you hope to accomplish this year?
I've set some goals for myself, my family, my blog, and my Etsy shop. I'm hoping to establish a regular exercise routine, get into our own apartment by summer, make myself a daily/weekly schedule to be a more effective blogger and self-employed mom, and make and sell items on Etsy on a more regular basis. Those seem kind of vague right now, but my husband and I are writing down our thoughts and ideas for how we want to reach our goals, and we're going to work together to help one another succeed at each of them. I'm giving myself this month to get those goals and plans organized. So come February 1st, I'm hoping everyday life will smooth out some and my posting will be a little more regular.
Another really exciting opportunity I've been given is to be a contributor for an inspirational blog. The blog founder/owner is a good friend of mine, and I'm so flattered that he thought to invite me to be one of the 10 bloggers for the site. I'll be posting there twice a month, every other Friday starting on January 11th. He shared with me some of his plans and goals for the blog, and I cannot wait to see where it goes!
So what is that blog, you ask? It's called ForwardWalking.com.The mission of it is to bring hope and inspiration to anyone going through difficult times, especially those struggling with low self esteem, addictions, deaths of loved ones, broken families, etc. I've read through several posts there already, and each one is so wonderful! At the end of every one I feel completely rejuvenated and ready to overcome my own challenges and trials. It's definitely inspiring, and a wonderful pick-me-up anytime you need it.
One of the main reasons I'm so glad to be a contributor there is to give myself and my hardships a purpose. I love to help others. If I can use my past trials to help someone currently going through something similar, I am more than happy to do so! I hate to see anyone struggling on their own when I could offer a helping hand. This is one way for me to do that.
Those are just a few of the exciting things happening for me as this new year begins.
What are your goals? What to you hope to accomplish this year?
Monday, December 31, 2012
Hopscotch Rug
I tried to make a lot of my Christmas gifts this year (big surprise, right?). Luckily, most of them were well received. Either that, or the people I made things for are just really nice.


I made each square 16 inches by 12 inches, measuring from the outside edges of the squares. The grey lines themselves are about 1 inch wide.


What other games would you like to see made into a rug like this?

One of my favorite gifts I made was this hopscotch rug for my nephews.

They live in Utah, and in the winter time there's so much snow that it's impossible to play these kinds of fun outdoor games. Now they can play it on rainy days, snow days, or swelteringly hot days, all within the comfort and safety of their home and the weather outside won't matter.
They live in Utah, and in the winter time there's so much snow that it's impossible to play these kinds of fun outdoor games. Now they can play it on rainy days, snow days, or swelteringly hot days, all within the comfort and safety of their home and the weather outside won't matter.
 |
| The boys opening it up on Christmas Day. |
But let me tell you, it was a beast to make! There is just so much fabric to it.
I found this nice and heavy orangey-brown upholstery fabric for the base of it, and then I decided to use grey broadcloth for the lines and to bind the edges. I went with bright green fleece for the numbers.
I made each square 16 inches by 12 inches, measuring from the outside edges of the squares. The grey lines themselves are about 1 inch wide.
I wish I had gotten 3 full yards of the upholstery fabric, but I only got 2.5, so the numbered squares only go up to 9 instead of 10. Oh well!
I made 6 little round bean bags to use with it, each a different color.

I even included a little pocket in one corner of the rug to keep the instructions and bean bags.

On one side of the instructions I wrote the rules to the game (there are so many different ways to play--I just picked the most basic, common way). On the other side I wrote a brief history of hopscotch and the care instructions for the rug.


I love how it turned out! But it was a lot of tedious work. If I ever make one to sell, it will be a little on the expensive side.
My nephews played it a couple of days after Christmas. At one point, one of them said, "This is actually really fun!" I guess they thought it was going to be boring. It's great for teaching them coordination and to use up some of that pent-up energy that kids tend to have.
What other games would you like to see made into a rug like this?
Linked up at:

Subscribe to:
Posts (Atom)