Alright, it's official. I'm no longer posting here...
Because I'm starting to post on my new blog!
My first post went up there today. However, I'm waiting to throw a full-blown launch party until Monday next week so that I can work out all the kinks and problems. It still does have some little quirks, so please forgive me while I work those out.
Please, please follow me there! I'll be posting in Facebook and on Twitter as new posts go up, and once I get the RSS feed working and get links to other social media hubs up and running, you ought to be able to follow me as you please.
So go and see my latest post! There's a free printable template for some really cute Valentine candy boxes. I think you'll like them!

Showing posts with label toys. Show all posts
Showing posts with label toys. Show all posts
Wednesday, January 30, 2013

Monday, December 31, 2012
Hopscotch Rug
I tried to make a lot of my Christmas gifts this year (big surprise, right?). Luckily, most of them were well received. Either that, or the people I made things for are just really nice.


I made each square 16 inches by 12 inches, measuring from the outside edges of the squares. The grey lines themselves are about 1 inch wide.


What other games would you like to see made into a rug like this?

One of my favorite gifts I made was this hopscotch rug for my nephews.

They live in Utah, and in the winter time there's so much snow that it's impossible to play these kinds of fun outdoor games. Now they can play it on rainy days, snow days, or swelteringly hot days, all within the comfort and safety of their home and the weather outside won't matter.

They live in Utah, and in the winter time there's so much snow that it's impossible to play these kinds of fun outdoor games. Now they can play it on rainy days, snow days, or swelteringly hot days, all within the comfort and safety of their home and the weather outside won't matter.
 |
| The boys opening it up on Christmas Day. |

But let me tell you, it was a beast to make! There is just so much fabric to it.
I found this nice and heavy orangey-brown upholstery fabric for the base of it, and then I decided to use grey broadcloth for the lines and to bind the edges. I went with bright green fleece for the numbers.

I made each square 16 inches by 12 inches, measuring from the outside edges of the squares. The grey lines themselves are about 1 inch wide.

I wish I had gotten 3 full yards of the upholstery fabric, but I only got 2.5, so the numbered squares only go up to 9 instead of 10. Oh well!

I made 6 little round bean bags to use with it, each a different color.


I even included a little pocket in one corner of the rug to keep the instructions and bean bags.


On one side of the instructions I wrote the rules to the game (there are so many different ways to play--I just picked the most basic, common way). On the other side I wrote a brief history of hopscotch and the care instructions for the rug.


I love how it turned out! But it was a lot of tedious work. If I ever make one to sell, it will be a little on the expensive side.
My nephews played it a couple of days after Christmas. At one point, one of them said, "This is actually really fun!" I guess they thought it was going to be boring. It's great for teaching them coordination and to use up some of that pent-up energy that kids tend to have.

What other games would you like to see made into a rug like this?
Linked up at:

Monday, December 17, 2012
Car Caddies
I love these things. I've seen a few basic tutorials for these, but (me being me) I'm not satisfied with plain, basic anything. No, no--I need everything I make to be a work of art (because I"m anal crazy OCD just that way).
I've made a few of these before, and I generally use whatever fabric I have, because leftover scraps from previous projects are awesome for these things. Plus, it makes each one more individual and unique. I also rarely use a pattern. I just know the size it needs to be and then I make up the design for the road on my own. It's been different every time.
A few months ago my friend Holly asked me to make a personalized one for her son, with his name on the pockets instead of numbers. I was swamped with other projects at the time (and let's be honest, when am I not?) so I planned to have it done and to her by Christmas. Then my cousin Marissa asked me for two as Christmas gifts too.
So I made a pattern this time, because it was easier to cut all the little tiny pieces of fabric out all at the same time, and then do each step on all three at the same time. I also have a feeling I'll be making more of these in the future, and a pattern will help them go quicker.
Here's how these turned out this time around.


Can I brag for a minute here? The numbers/letters are painted on using white acrylic paint. I free-handed these! No stencils used! It did take longer than using a stencil, but I was curious about whether I could do it or not. Survey says... I succeeded.
I did something new on these ones too, and I really like it. I used some fabrics with various textures for different little details in it. The road is a rough polyester, the pond a shiny satin, the tree trunk is suedecloth, and the tree leaves are terry cloth. I used orange acrylic paint and did some very careful painting to get those fish in the pond.

Isn't that cute and fun?!
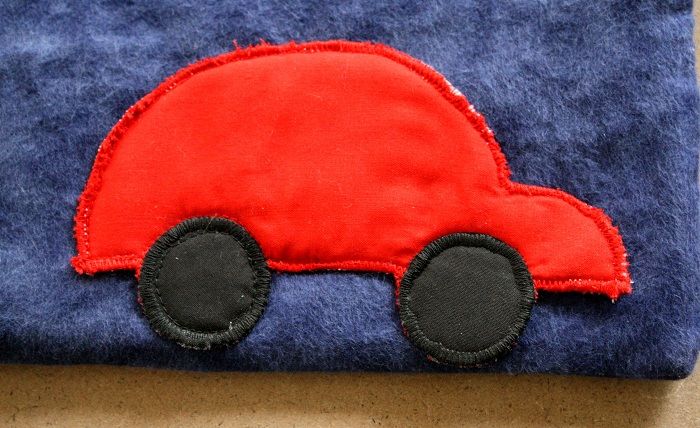
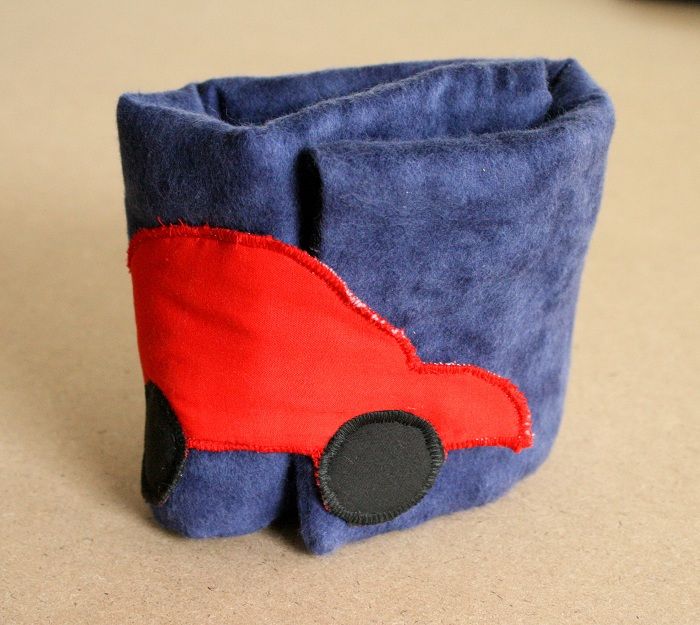
I couldn't just use webbing or ribbon for the latch to keep it closed. Of course not. I made a velcro latch for it in the shape of a car.


I'm pretty happy with these results. What do you think?
I've made a few of these before, and I generally use whatever fabric I have, because leftover scraps from previous projects are awesome for these things. Plus, it makes each one more individual and unique. I also rarely use a pattern. I just know the size it needs to be and then I make up the design for the road on my own. It's been different every time.
A few months ago my friend Holly asked me to make a personalized one for her son, with his name on the pockets instead of numbers. I was swamped with other projects at the time (and let's be honest, when am I not?) so I planned to have it done and to her by Christmas. Then my cousin Marissa asked me for two as Christmas gifts too.
So I made a pattern this time, because it was easier to cut all the little tiny pieces of fabric out all at the same time, and then do each step on all three at the same time. I also have a feeling I'll be making more of these in the future, and a pattern will help them go quicker.
Here's how these turned out this time around.
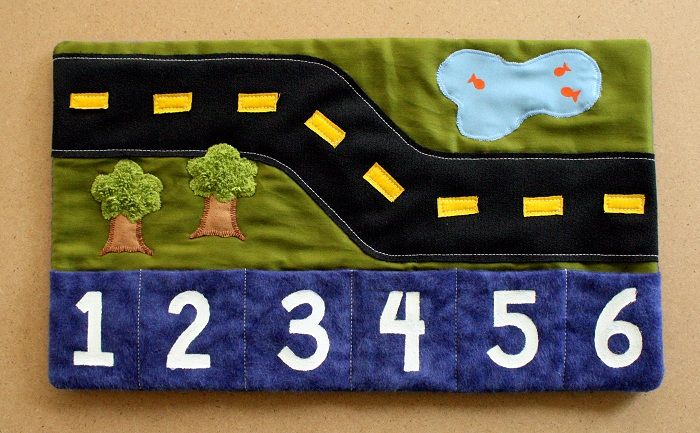
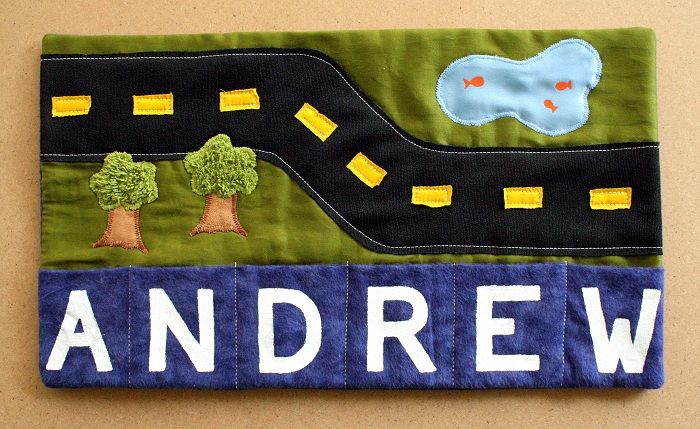
I did something new on these ones too, and I really like it. I used some fabrics with various textures for different little details in it. The road is a rough polyester, the pond a shiny satin, the tree trunk is suedecloth, and the tree leaves are terry cloth. I used orange acrylic paint and did some very careful painting to get those fish in the pond.
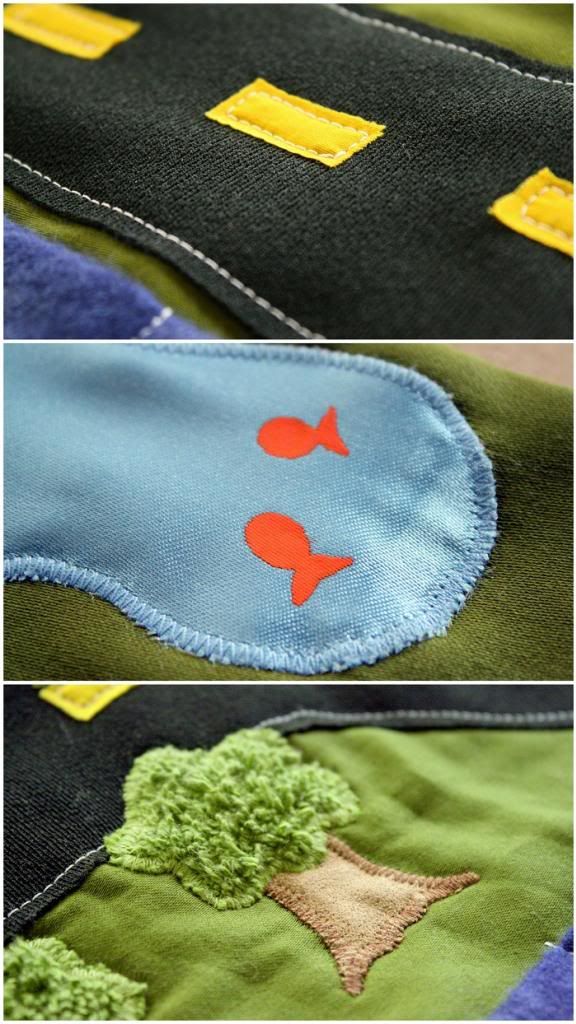
Isn't that cute and fun?!
I couldn't just use webbing or ribbon for the latch to keep it closed. Of course not. I made a velcro latch for it in the shape of a car.
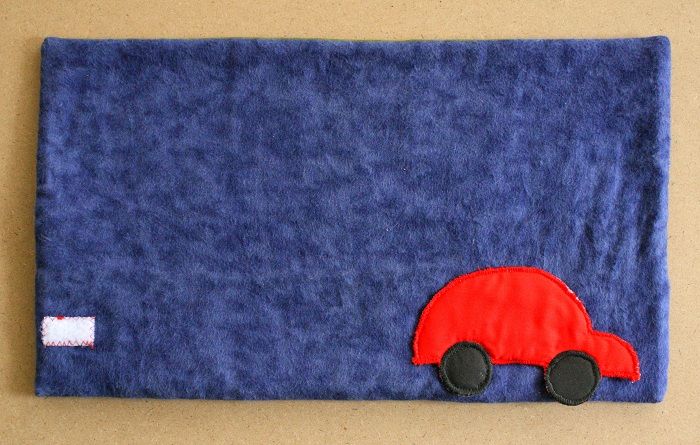
I'm pretty happy with these results. What do you think?
Subscribe to:
Posts (Atom)