
I left my husband in charge of getting it done. We bought the supplies we needed, I found my pint of brown chalkboard paint leftover from making my own chalkboard and bulletin board set, and I explained my vision of it to Bob. He offered some ideas, and with our combined thoughts, he got to work on it.
And then a setback happened, as they always do.
Bob spray painted the frame red, and while it was drying outside on a chilly evening, the wind blew it over and one side of it broke in half, jostling 3 of the corners loose.
A couple of screws, a paint stir stick, two kinds of glue, and a staple gun later, it was back together.
But there was still the problem of the obvious big crack in one side of the frame. (I failed to take any pictures of that, sorry.) But I had a decent solution for it.
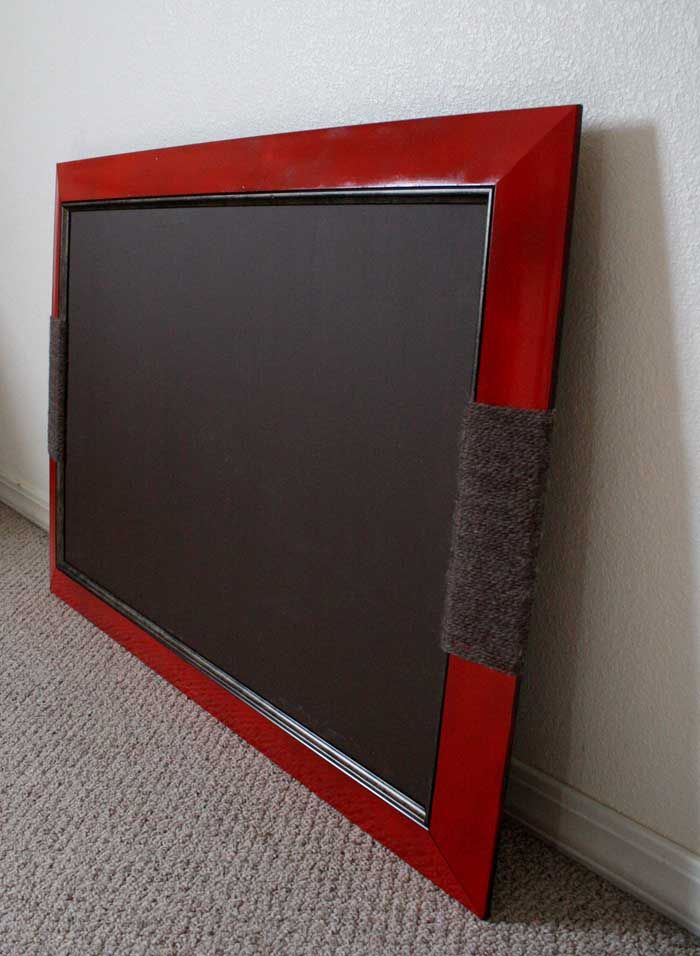
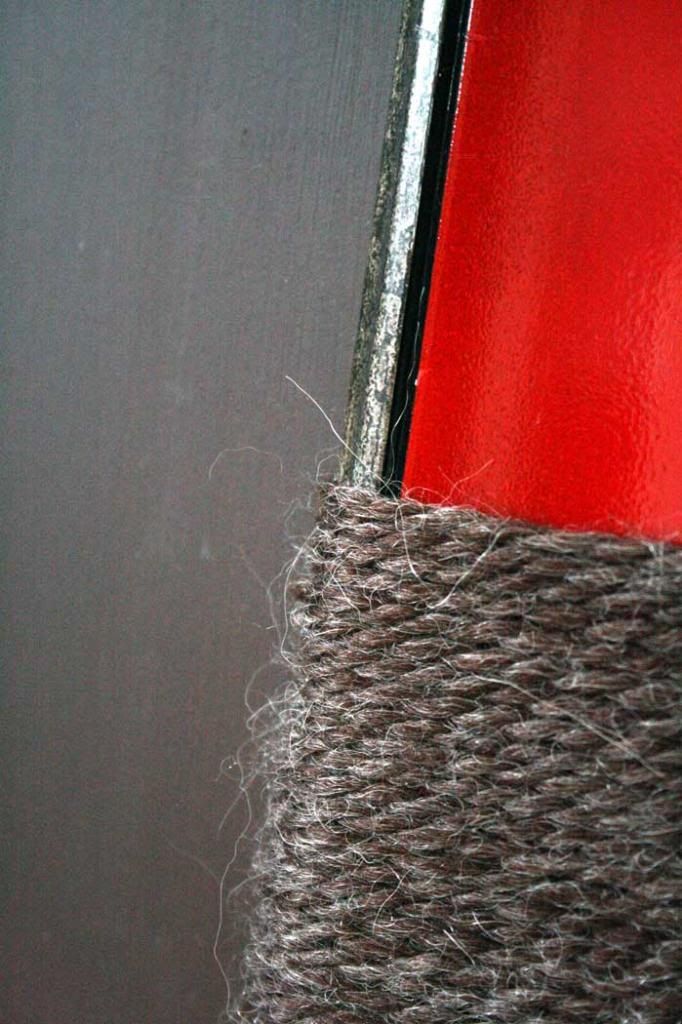
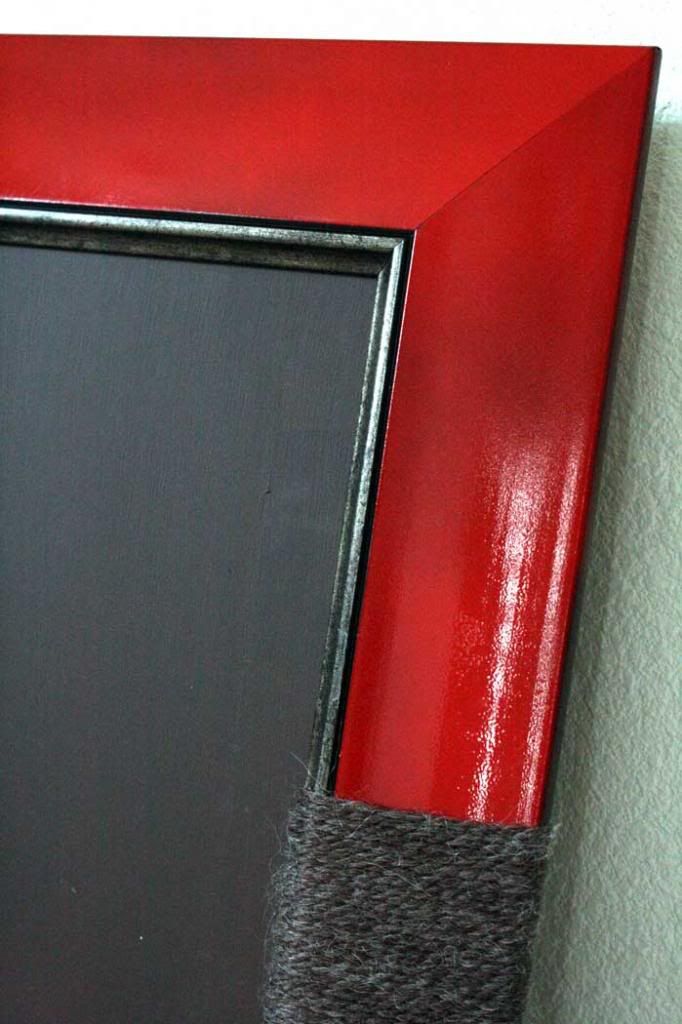
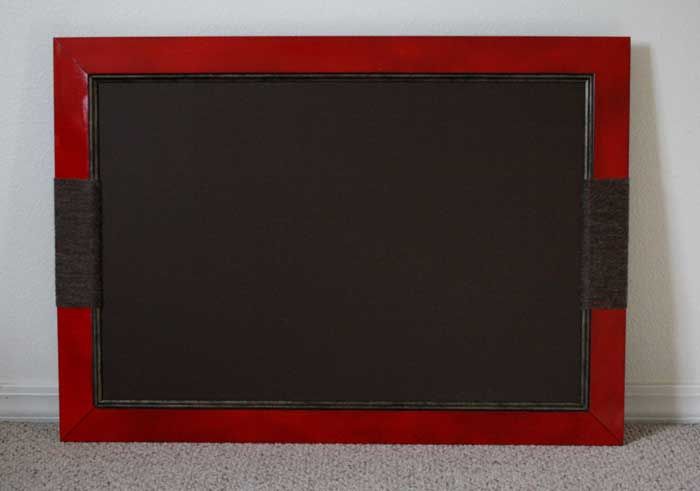
I used Elmer's glue and some alpaca yarn I had leftover from the Christmas ornaments that I made for a craft swap, and used it to wrapped the side that had the crack in it, along with the opposite side of the frame so that it would be symmetrical and match. I put glue directly on the front of the frame where the yarn would be covering it, as well as on the back to keep it in place.
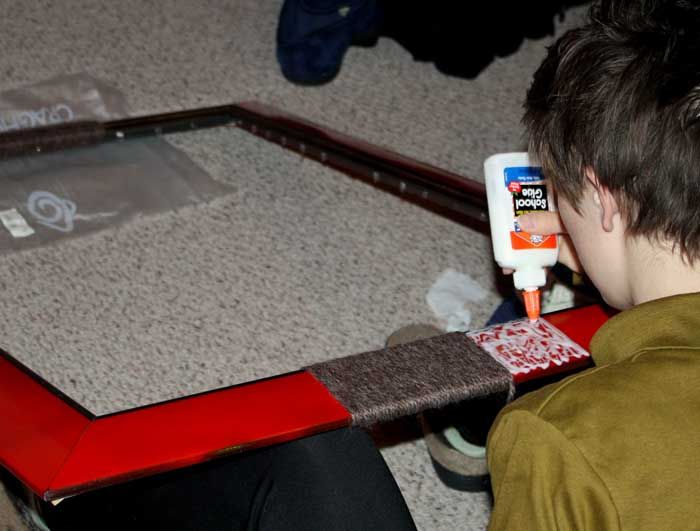
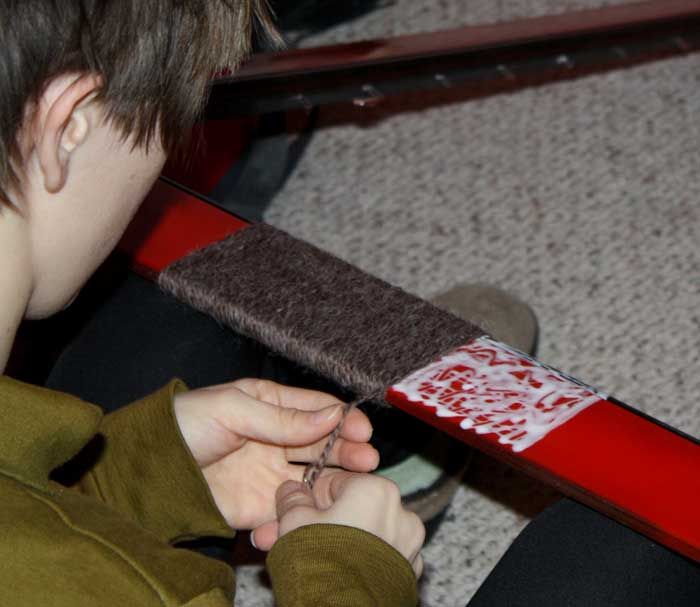
(I love that this alpaca yarn looks like a course string but is really soft to the touch.)
I think I like it more with the yarn around it than without it. And the cool thing about yarn is that it stretches a little bit, so as I wrapped it I tried to keep it sort of loose. That way when we put the chalkboard into the frame the yarn stretched enough to let it sit nice and flat inside of it.
A tip: If you're making your own, or if you end up with one, I recommend that before using it for the first time take a piece of chalk and color in most of the chalkboard, then go back and erase it. That initial coat of chalk will make it erase better and more cleanly.
Ashley, I have no idea where you're going to put this (and if it stays in your closet for a while, that's fine too). But I hope it comes in handy at some point!
No comments:
Post a Comment